Unit 5- Digitally Altering and Creating Images
 |
| Collage created using Ribbet |
Ribbet
I had a great time playing around with Ribbet (http://www.ribbet.com/photo-editor-like-picnik). Right away I was drawn to how easy it was to use this resource. There are many features to this site. One of the first things I noticed right away, is that there are four different things you can create via Ribbet: a grid collage, shape collage, blank canvas, and a fancy card.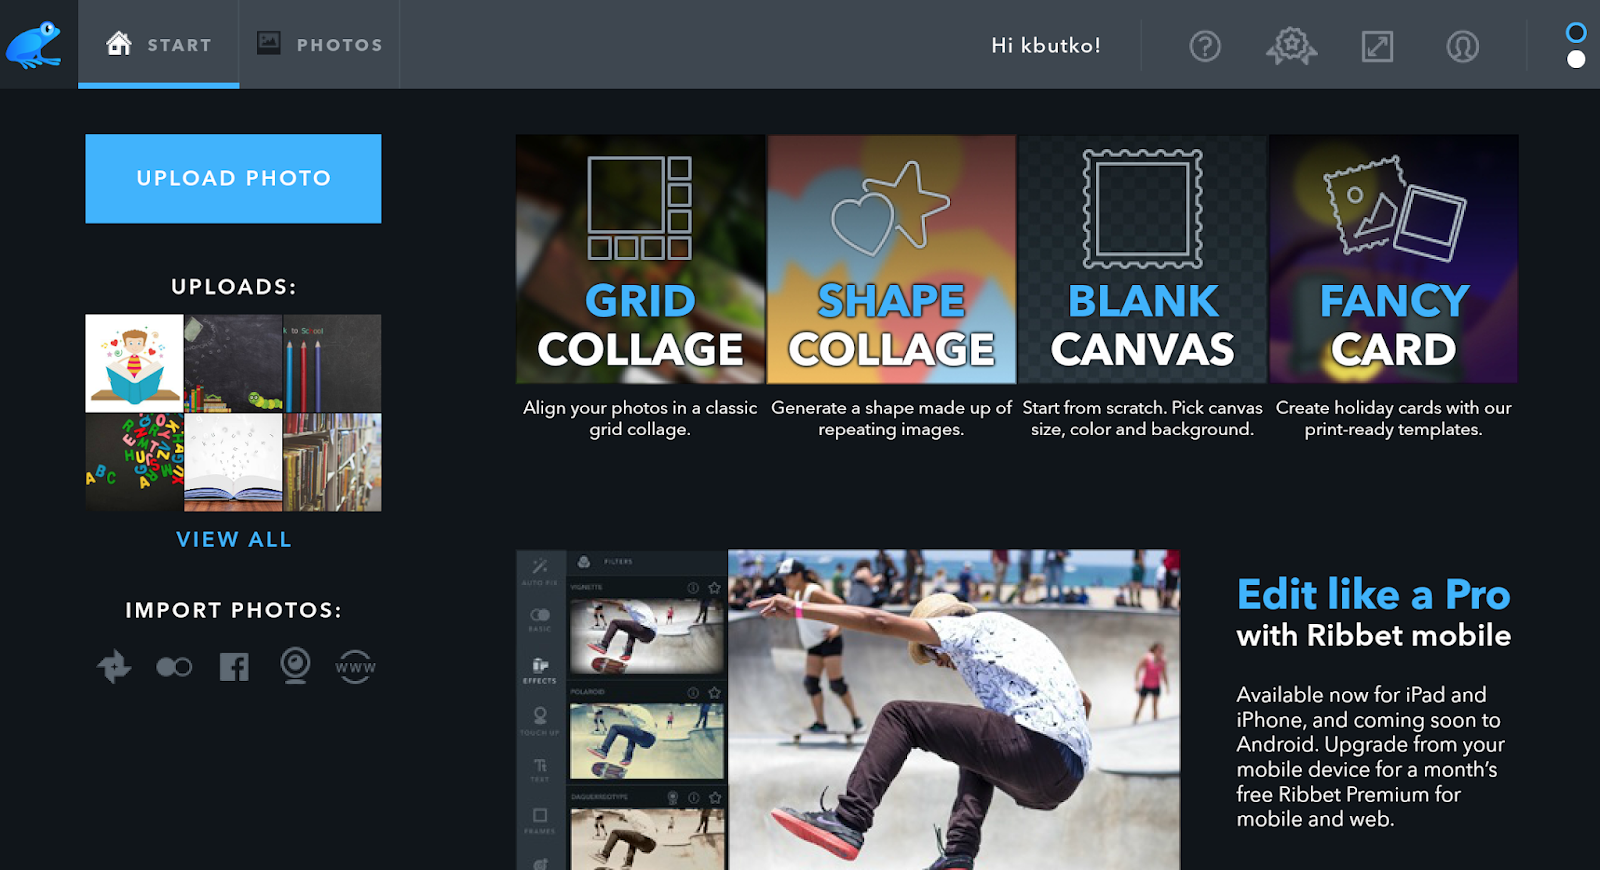

The next tool I used was the shape collage. This is a cool feature. You upload the photos you want to use, drag a photo to the screen and then decide upon what shape you want to create with the photo or photos you select. For the heart image I created above, I initially used one photo and figured out by clicking on the different pictures I had saved, that they were automatically added to the shape created. You can decide how sharp the pictures are, what color the background is, and you can even add text and select the font to use. Of course there are are more options if you subscribe to the resource.
Next I tried the blank canvas. Before starting, users can choose the background color of the canvas and decide upon the dimensions of the canvas. Once you have the size you want, you can add the images you want to the canvas. On the left hand side of the screen there is a toolbar where you can select the different effects to add to your project. The options include: text, stickers, options to retouch images, and etc. I decided to create a flyer for library orientation:
 |
Ribbet is a very user-friendly tool and there are so many options. I do feel that the premium features open up more possibilities, however, the free option gives users many options to create great images.
BeFunky
The other site I really liked is BeFunky (https://www.befunky.com/). Just like Ribbet, BeFunky is a great tool to use to create and enhance your digital images. And just like Ribbet, this site does have a free option along with a paid option. I do feel that BeFunky gives more free options to choose from than Ribbet, however, for both, upgrading do a subscription gives users more choices. With this web tool, BeFunky has three options for users to use to manipulate images: photo editor, collage maker, and design.
Just like Ribbet, I couldn't wait to try out the different options and created a few things. The first feature I tried was the photo editor. With BeFunky, I was able to use a few more photo editing options, so I experimented with a photo of myself. There are so many neat options. Here is a collage of the altered images:

Just like Ribbet, it is super easy to add photos, and decide how to change or add effects to images. The designer option is like a blank canvas with lots of tools to use. Here is another collage I created with BeFunky and an image I created using the designer option:
 |
| Collage |
 |
| Made with the Designer option |


You've have stumbled on to two of the easiest and fun online photo editors. Thank you for your clear explanations and viewpoints of these Web Tools. You have also given us great images of what the apps can do. They look Great!
ReplyDeleteBy having a screen shot of Ribbet's page, it helps your readers gauge their editing skills and allows them the choice whether they should use that tool or not. Great add!
I really like both of these tools that you shared. I have not used either of them so I am excited to try them out soon. Thanks for all the detail on the elements and key features of each one. The examples you show are very important and a good "selling" feature. It is easier to "see" when examples are shown. Fun tools!
ReplyDeleteI really appreciated the visual support as you described the tools. Great job!
ReplyDelete